


Building a PC can be an exciting and rewarding experience, allowing you to customize your computer to suit your specific needs. Whether you want to play the latest games, edit videos, or simply browse the web, knowing how to build a PC yourself gives you the flexibility to create a machine that meets your exact requirements. This guide will walk you through the steps of building a PC, ensuring you have a seamless experience from start to finish.
Choosing Your Components Wisely
When learning how to build a PC yourself, choosing the right components is vital. Consider what tasks you want your PC to perform, as this will guide your selection. For gaming, invest in a powerful CPU and a high-quality graphics card. If video editing is your focus, prioritize a substantial amount of RAM and a fast storage solution, like an SSD. Research compatibility between components, ensuring that your motherboard supports your chosen CPU and RAM type.
Installing the CPU
Once you have gathered all your components and prepared your workspace, the first step in the assembly process is installing the CPU. Begin by opening the CPU socket on the motherboard by lifting the lever. Align the CPU correctly with the socket, ensuring the notches on the CPU match those on the motherboard. Gently place the CPU into the socket and secure it by lowering the lever. Be cautious not to apply excessive force, as this can damage the CPU or motherboard.
Adding Thermal Paste
After installing the CPU, the next step is to apply thermal paste. This compound is crucial for heat transfer between the CPU and the cooler. A small pea-sized amount of thermal paste in the center of the CPU is sufficient. When you install the cooler, it will spread the paste evenly across the surface. Ensure you do not use too much thermal paste, as this can lead to overheating.
Installing the CPU Cooler
With the thermal paste applied, it is time to install the CPU cooler. Depending on your cooler type, follow the manufacturer’s instructions for installation. Most coolers will require you to secure them with screws or clips. Make sure the cooler is firmly attached to the CPU to ensure optimal cooling performance. If you have chosen a liquid cooler, follow the specific instructions for mounting the radiator and pump.
Inserting the RAM
Once the CPU and cooler are installed, the next step is to insert the RAM sticks. Locate the RAM slots on the motherboard, usually positioned next to the CPU. Open the clips on the sides of the slots and align the notches on the RAM sticks with those in the slots. Firmly push down until the clips snap back into place, securing the RAM. It’s best to consult the motherboard manual to determine the optimal slots for dual-channel configuration.
Installing the Motherboard
With the CPU and RAM in place, the next step is to install the motherboard into the case. Carefully place the motherboard into the case, aligning it with the I/O shield and mounting standoffs. Secure the motherboard using screws to hold it in place. Be cautious not to overtighten the screws, as this can damage the board.
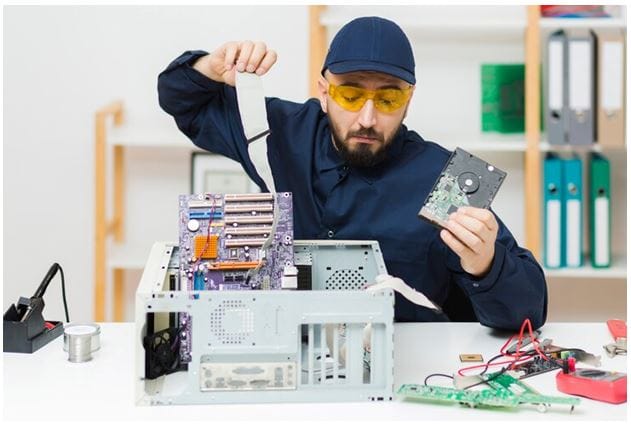
Adding Storage Devices
After securing the motherboard, it’s time to install your storage devices. Depending on your setup, you may have one or more hard drives or SSDs. For SSDs, find the appropriate M.2 slot on the motherboard or 2.5-inch drive bays. For traditional hard drives, mount them in the designated bays and secure them with screws. Connect the SATA cables from the drives to the motherboard, ensuring a snug fit.
Installing the Power Supply
The next step in how to build a PC yourself is to install the power supply. Start by placing the power supply in its designated area within the case, usually at the bottom or top, depending on the case design. Secure it with screws and route the necessary power cables towards the motherboard and other components. Make sure to connect the 24-pin ATX cable to the motherboard and the 8-pin CPU power cable to the CPU socket.
Connecting Cables and Peripherals
With all components securely in place, it’s time to connect the various cables. Start with the front panel connectors, which include power buttons, USB ports, and audio connectors. Refer to the motherboard manual for the correct pin configurations. Next, connect the SATA cables for storage devices, ensuring they are securely plugged in. Finally, check that all power connections are snug and properly routed to avoid interference with airflow.
Finalizing the Build
After connecting all cables and components, take a moment to review your work. Double-check that all connections are secure, and ensure no cables are obstructing fans or airflow. Once you are satisfied, close the case by attaching the side panels. Make sure the case is positioned in a well-ventilated area to prevent overheating.
Installing the Operating System
The final step in learning how to build a PC yourself is to install the operating system. Use a USB flash drive or DVD containing your preferred OS, such as Windows or Linux. Boot the PC and enter the BIOS settings to adjust the boot order if necessary. Follow the on-screen instructions to install the OS. Once installed, you can begin customizing your computer and installing necessary drivers and software.
Enjoying Your New PC
Congratulations! You have successfully built your own PC. Take some time to explore your new machine and install your favorite applications and games. Building a PC not only provides a sense of accomplishment but also ensures you have a customized system tailored to your needs. Now that you know how to build a PC yourself, you can confidently share your knowledge with others and even consider upgrading or expanding your build in the future.


